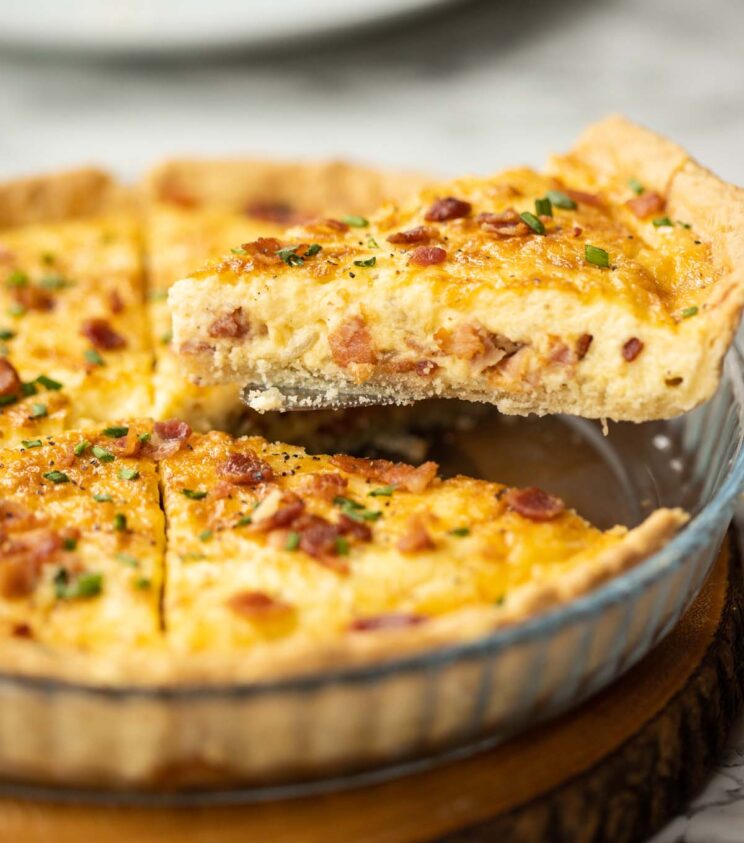
Here I’ll share with you some game-changing tips and tricks to making the most delicious Quiche Lorraine imaginable!
Can you believe this is the first quiche recipe I’ve ever uploaded?! For a self-proclaimed comfort foodie, I’m disappointed it’s taken me this long. But, the wait is worth it, I promise. Follow me…
Homemade Quiche Crust
Aka shortcrust pastry. It’s not often you’ll see me making pastry on this blog, but for shortcrust I can make an exception, given how simple it is to make.
It’s actually one of the first things I ever learned to cook back in D&T at school and it’s a method that’s stuck with me ever since. Whilst you can use a food processor, which I’ll give instructions for in the recipe card below, I’m pretty old school and prefer making it by hand. You know, just to feel at one with the food.
Shortcrust Pastry Ingredients
- Flour – Plain/All Purpose flour does the trick.
- Butter – I prefer unsalted butter with added salt, but you can use salted if that’s what you’ve got on hand.
- Salt – Always remember to season your pastry!
- Water – Must be cold (see below).
Keeping everything cold
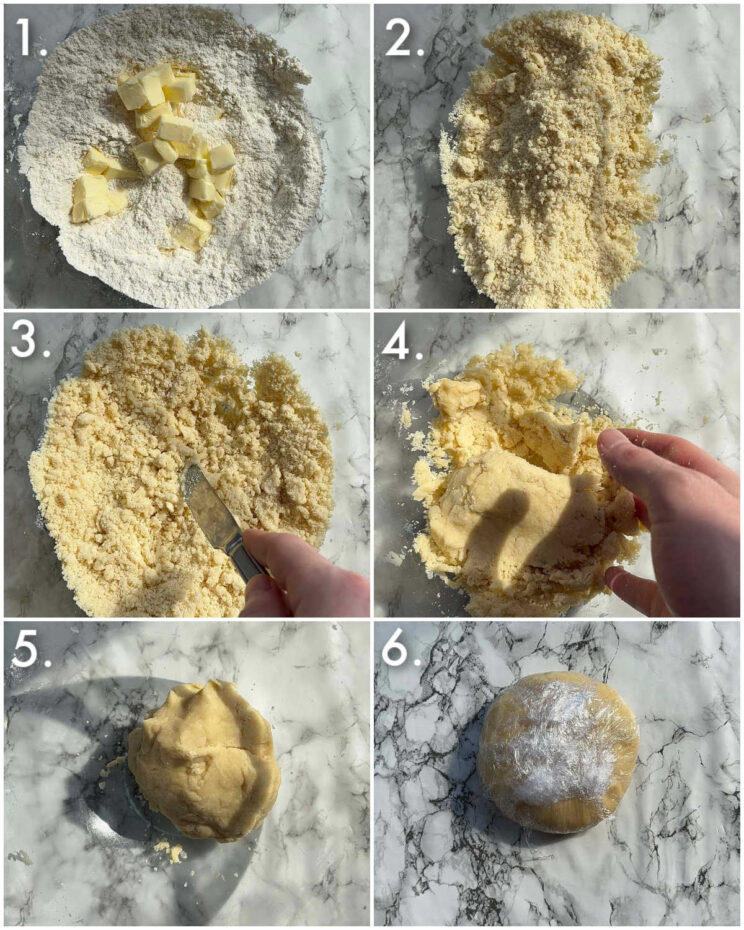
The key to great shortcrust pastry is ensuring the butter stays cold. This is what creates that iconic flaky/crumbly texture. In order to keep the butter cold, you’ll want to work fairly quickly so the butter doesn’t melt and turn the dough greasy. Using cold water is essential too, as is handling the dough as little as possible.
Minimal handling
You don’t want to knead the dough or squeeze it too much, as this will develop gluten and result in a firm pastry. Also, the more handling, the warmer the dough gets.
Process shots: whisk salt & flour then add cold butter (photo 1), rub into a crumb-like texture (photo 2), cut/mix in water (photo 3), form dough (photos 4&5), tightly wrap and chill (photo 6).
Blind Baking
Blind baking the pastry helps give it a kickstart before you add the filling. It’ll partially cook, which helps prevent the filling from soaking into the dough and causing it to go soggy.
What can I use to blind-bake the pastry?
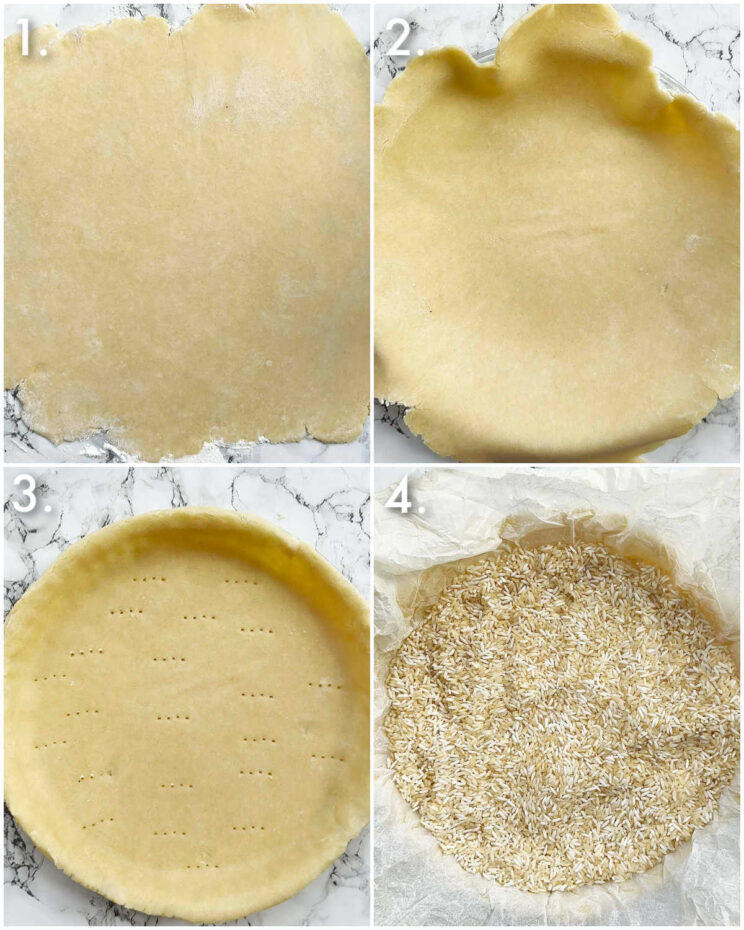
You’ll first want a layer of baking paper or foil, then on top of that, you want something that will weigh it down and won’t burn in the oven. Pie beads or dry beans are great – here I opt for uncooked rice.
Once you’ve rolled out the dough and added it to the pie dish, you’ll want to prick the base with a fork. This will help prevent air bubbles from forming, which in turn causes the pastry to crack as it cooks.
Process shots: roll out dough (photo 1), add to greased dish (photo 2), trim then prick (photo 3), add pie weight and bake (photo 4).
Quiche Lorraine Filling
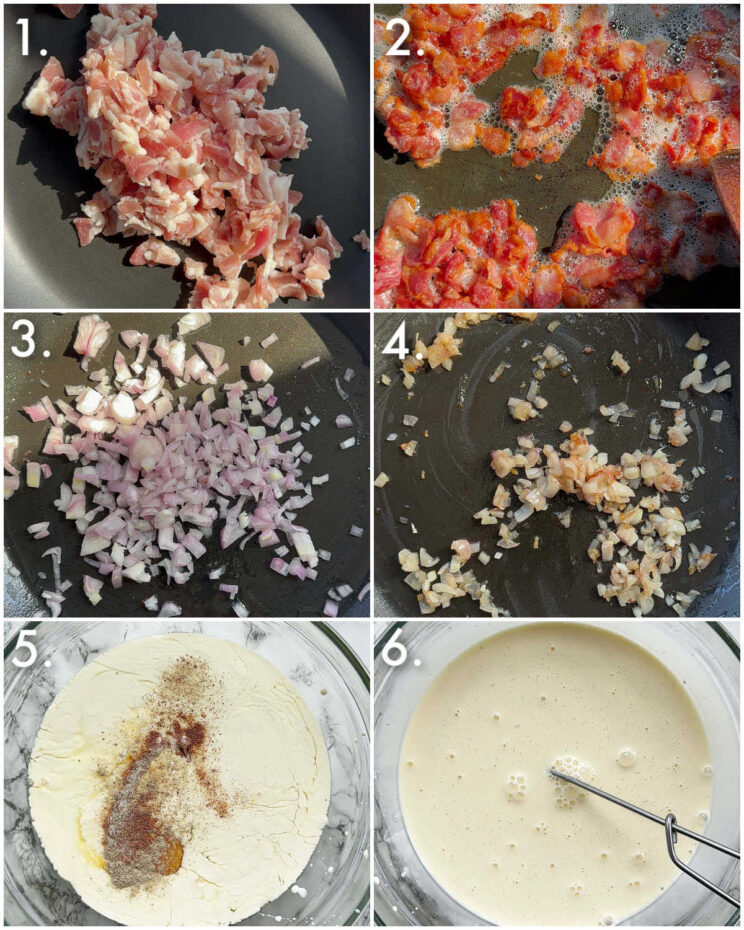
The fillings for a classic Quiche Lorraine are fairly minimal, but they all work together so well to create the most delicious quiche! Here I’m just frying off some bacon and then using the leftover fat to fry some shallots.
For the cream filling you’ll want a base of eggs and double/heavy cream, alongside a simple seasoning mix. Double cream is essential for its thick texture, which will easily set as the quiche bakes. Plus it adds a gorgeous richness to the quiche – and let me tell you this quiche is RICH 😛
Process shots: fry bacon (photos 1&2), fry shallots (photos 3&4), add cream, eggs, nutmeg, salt and pepper to bowl (photo 5), whisk (photo 6).
Quiche Lorraine
The final piece of the quiche puzzle is, of course, cheese. For this recipe, I LOVE a 50/50 combo of Cheddar and Gruyere. The Cheddar adds a real punch of flavour, whilst the Gruyere adds a gorgeous nutty flavour.
Layering the quiche
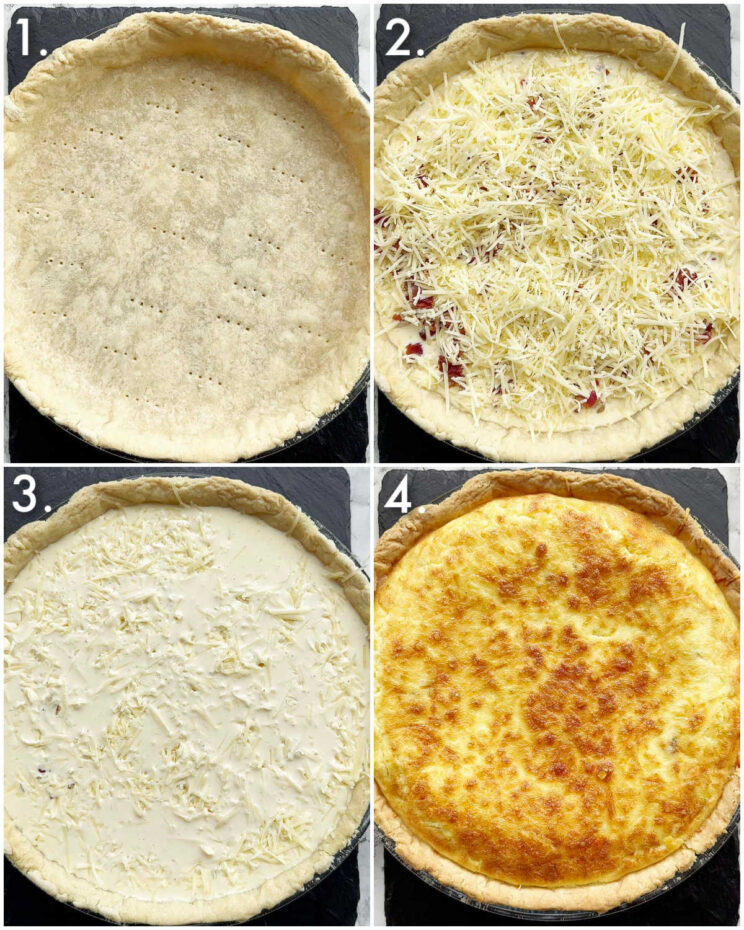
The perfect quiche is one where the fillings are evenly distributed. At the end of the day, quiches are gonna quiche, so there will be some sinkage. But, to help prevent this I recommend layering the fillings. Here I do bacon & shallots, then cheese, then cream. Repeat and you’re good to go.
Process shots: bake pie uncovered (photo 1), create one layer (photo 2), create second layer (photo 3), bake (photo 4).
Quiche Lorraine FAQ
How do I know when the quiche is cooked?
The top will be golden and the centre will be just about set (you can check with a knife). It will still jiggle a little and will carry on cooking as it rests.
Can I use store-bought pastry?
Sure! Just roll out the pastry and continue the recipe.
How do I prevent the pastry from cracking?
This can sometimes happen when blind-baking. Poking holes will help, as will making sure the oven temp is correct (too high and it’ll burn/crack). I’ve added a note on this in the recipe card below!
Serving Quiche Lorraine
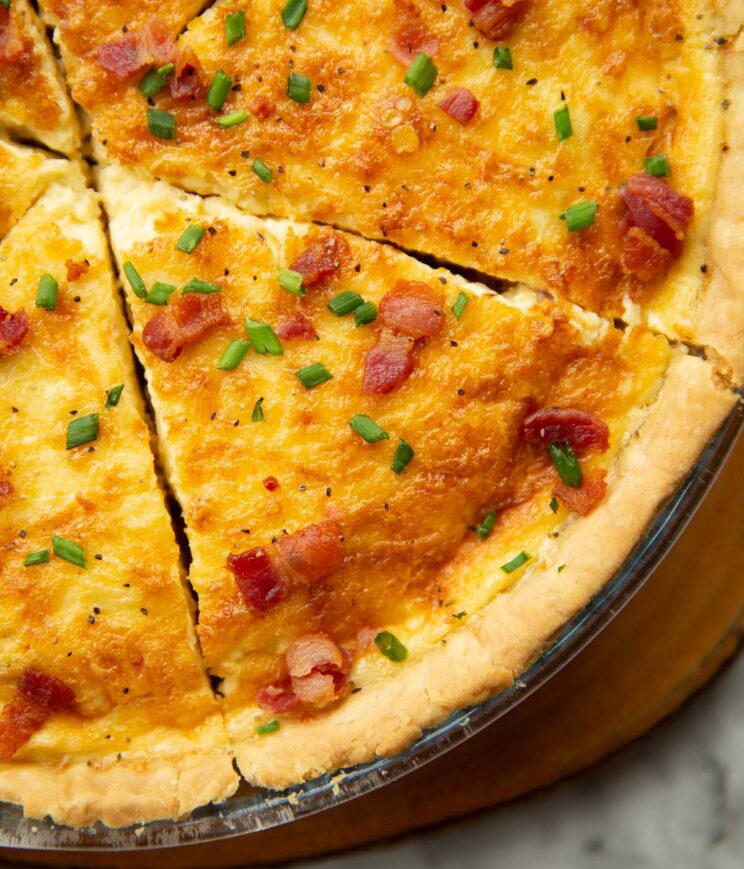
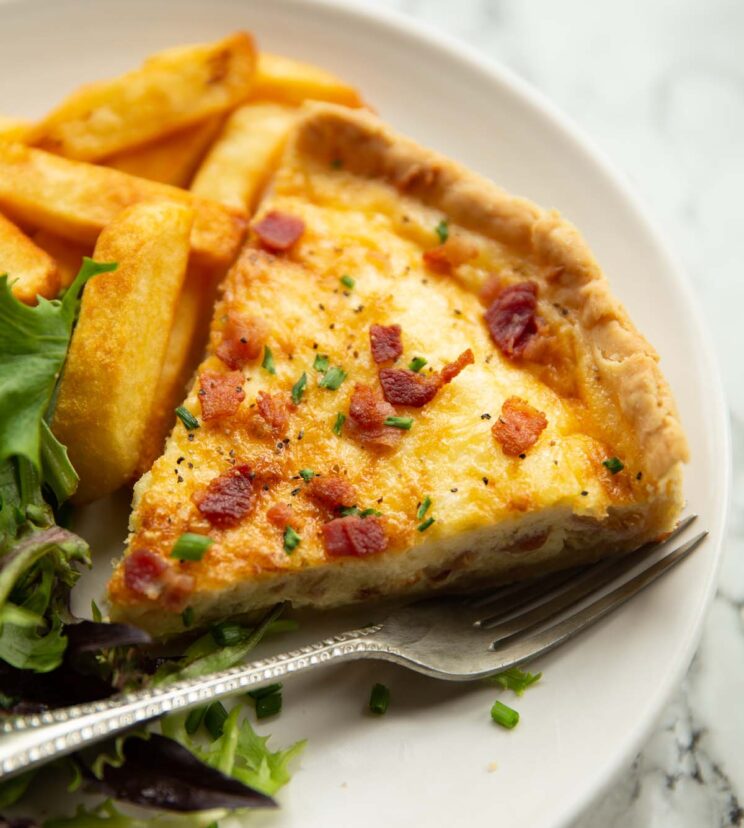
Once out of the oven, let the quiche rest, then garnish with chives and more bacon! Here I’ve served with chips and a side salad, but it’s honestly pretty perfect as it is.
For another quiche recipe check out my Breakfast Quiche Stuffed Bagels!
Alrighty, let’s tuck into the full recipe for this Quiche Lorraine shall we?!
How to make Quiche Lorraine (Full Recipe & Video)

Incredibly Delicious Quiche Lorraine
Equipment
- Large Mixing Bowl & Knife (preferably keep both in the fridge until needed)
- Cling Film (for resting pastry)
- Rolling Pin
- 23-25cm / 9-10" Pie Dish (see notes)
- Baking Paper or Foil + Pie Weights (see notes)
- Sharp Knife & Chopping Board
- Frying Pan & Wooden Spoon (for bacon/shallots)
- Mixing Bowl & Whisk (for cream/eggs)
- Cheese Grater
Ingredients
Pastry
- 200g / 7oz Plain/All Purpose Flour, plus a pinch more for rolling dough
- 100g / 3.5oz COLD Unsalted Butter, diced into small cubes (plus a knob more for greasing dish)
- 1/2 tsp Salt
- 2 - 3 tbsp COLD Water, or as needed
Filling
- 220g / 8oz Bacon, diced
- 2 large Shallots, finely diced
- 3 large Eggs
- 300ml / 1 1/4 cup Double/Heavy Cream
- 1/8 tsp EACH: Salt, White Pepper, Ground Nutmeg
- 60g / 2oz Gruyere, grated
- 60g / 2oz Cheddar, grated
- finely diced Fresh Chives, to garnish
Instructions
- Whisk the flour and salt together in a large mixing bowl. Add the butter and use your finger tips to rub the butter into the flour until a crumb-like texture with no large lumps. Try and work quick so the butter stays cold.
- Add in 2 tbsp cold water and use a knife to cut and mix the water into the flour. Once the water is well distributed the crumbs should start to clump together. Pick up a small amount and check if it is able to mould into dough. If the dough is too crumbly you can mix in more water 1 tsp at a time. Form the dough into a ball then shape into a large disk and tightly wrap it in cling film. Rest in the fridge for at least an hour (up to overnight).
- Lightly flour a clean surface and roll out the dough until it comfortably covers the rim of the pie dish. Grease the dish with butter then carefully place in the pastry, gently pressing it into the base of the dish. Trim excess pastry then prick the base all over with a fork. I recommend placing it back in the fridge for 15mins or so to cool back down at this point. Preheat oven to 180C/350F.
- Add foil or baking paper on top of the pastry and weigh down with pie weights, ensuring they cover the whole base. Place in the oven for 20 minutes. Remove from the oven and carefully remove the pie weights and baking paper/foil. Place back in the oven for 5-10mins until light golden. Check after 5 mins and remove if it's golden and/or air bubbles are forming.
- During this time fry the bacon over medium heat until crispy with the fat rendered down. Remove and dry on kitchen roll, then remove all but a couple of tsp of fat from the pan. Fry the shallots in the leftover fat until soft and golden, then remove and place to one side with the bacon (set some of the bacon aside to garnish). In a medium-sized mixing bowl whisk together the eggs, cream, salt, pepper and nutmeg until smooth and well-combined.
- Sprinkle half of the bacon & shallots into the pie, then top half of the cheese and half of the cream. Repeat then place in the oven for 25-30 minutes, or until golden on top and just about set in the centre (check with a knife to see if it's set - keep in mind it will carry on cooking slightly as it rests). The quiche should jiggle a little. Rest for 10mins before serving up. Garnish with bacon and chives then tuck in and enjoy!
Video
Notes
Nutrition
The post Incredibly Delicious Quiche Lorraine appeared first on Don't Go Bacon My Heart.